


High Velocity Migrations with GCVE and HCX
What is HCX?
VMware HCX is an application mobility platform designed for simplifying application migration, workload rebalancing and business continuity across datacenters and clouds. VMware HCX was formerly known as Hybrid Cloud Extension and NSX Hybrid Connect.
GCVE HCX
GCVE deploys the Enterprise version of HCX as part of the cost of the solution.
HCX Enterprise has the following benefits:
- Hybrid Interconnect
- WAN Optimisation
- Bulk Migration, Live Migration and HCX Replication Assisted vMotion
- Cloud to cloud migration
- Disaster Protection
- KVM & Hyper-V to vSphere migrations
- Traffic Engineering
- Mobility Groups
- Mobility Optimised Networking
- Changeover scheduling
Definitions
Cold Migration
Cold migration, as the name suggests, performs the entire migration with the VM powered off.
This option is automatically selected when the origin VM is powered off or the VMware hardware level is below v4.
Bulk Migration
A migration type that keeps a copy of the VM on the origin vSphere. All VM’s in a bulk migration batch are powered off at the same time and powered on at the target site as soon as the delta sync has completed.
During the cutover window, Bulk migrations power off the origin VM and perform the final delta sync. The target VM is then powered on.
This can take a few minutes to complete, but is useful if you require a copy of the VM at the origin site or your VM hardware level is not above v4.
vMotion
A migration type that enables moving a VM to a target site without the machine being left at the origin.
vMotion is an online migration where connectivity loss is kept to a minimum. (Expect 0-6 lost pings)
VMs using vMotion are cutover one-at-a-time at the cutover window.
This migration type requires VMware hardware level v9.
Replication Assisted vMotion (RAV)
RAV is useful for large VMs that are impracticle to migrate using vMotion.
Like standard vMotion, RAV performs cutovers one-at-a-time. And like vMotion, connectivity loss is kept to a minimum.
This migration type requires VMware hardware level v9.
Pre-requisites
There are some basic pre-requisites to migrating workloads into GCVE. These are:
- vCenter/ESXi version MUST be at least 5.5 or greater. Hopefully you aren’t running anything that old.
- All on-premise switching needs to be in distributed virtual switches. vSphere Standard Switches are not supported.
- Connectivity needs to be at or above 100Mbps to GCVE. If you are going down the GCVE route, I would recommend an interconnect of at least 1Gbps.
- VM hardware version of your workloads will dictate what types of migrations you can do, so bring them all up as high as possible before you start:
- Bulk Migration (Minimum VMware Hardware v7)
- vMotion and Replication Assisted vMotion (Minimum VMware Hardware v9)
Now that all this is out of the way, let’s get into setting HCX up and migrating workloads to GCVE.
Deploying HCX to On-Premise vCenter
- Head over to the GCVE page in GCP and select your private cloud.
- On the summary page, you will see a download link to HCX Manager Cloud version. (Mine shows version 4.2.4)
- Click the download link to download the activation key.
- Now click the version to open the HCX application and login with your credentials.
- Head to Administration -> Support and click the button “Request Download Link”.
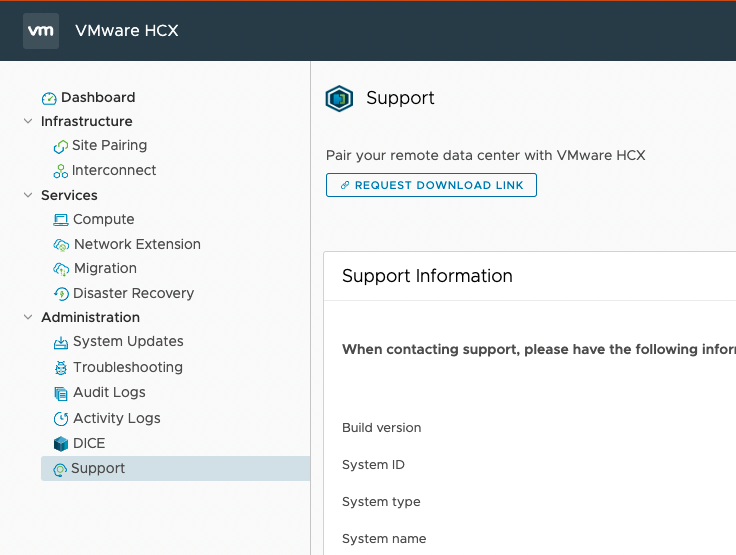
- This should change to two buttons. “VMware HCX” and “Copy Link”
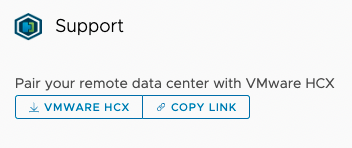
- Use whichever works for you to deploy the OVA to your on-premise vCenter. (I used the copy link and then deployed from URL in on-premise.)
More information on the complete deployment process of the HCX OVA is here
It can take 5 minutes or so for the new appliance to come online. Head to https://ip-address-of-hcx:9443/ to test it out.
Create a Site Pair
Once your appliance is online on-premise, you will need to create the site pairing with GCVE. This is a really simple process detailed below.
- Open HCX in GCVE and then navigate to Infrastructure -> Site Pairing.
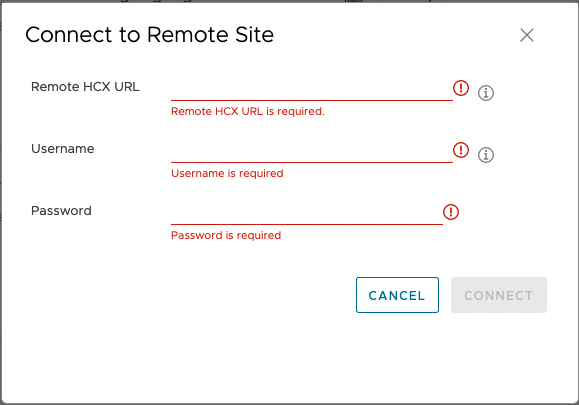
- Click the ‘Add a Site Pairing’ button on the top right of the window.
- Add your on-premise HCX URL, username and password and click Connect.
- Once it is complete, it should look like this:
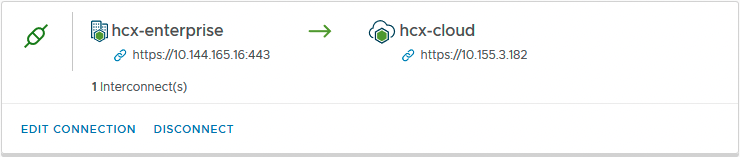
To achieve bi-directional site pairing, repeat this process on-premise as well.
Create a Compute Profile
A compute profile contains the compute, storage and network settings that HCX uses on this site to deploy the interconnect-dedicated virtual appliances when a service mesh is added in our next step.
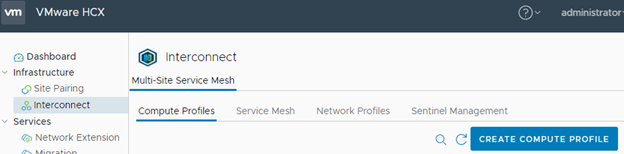
- Open HCX in GCVE and navigate to Infrastructure -> Interconnect -> Compute Profiles.
- Click the “Create Compute Profile” buttont at the top right.
- Enter a name for the profile and click Continue.
- Select the HCX services to be activated and click Continue.
a. HCX is provisioned with the Enterprise license, so all options should be available.) - Select the Service Resources:
a. Select each cluster to be activated for HCX services.
i. If there is only one cluster, it is selected automatically.
b. Click Continue. - Set the resource and resource reservations:
a. From the Select Resource dropdown menu, select each cluster or resource pool to be used when deploying HCX appliances.
b. From Select Datastore dropdown menu, select the datastore to be used.
c. Select the Folder if you wish to use this.
d. Using the sliders for Appliance Reservations, select the amount of CPU & Memory to reserve for HCX Operations.
i. VMware suggests to set both to 100 percent.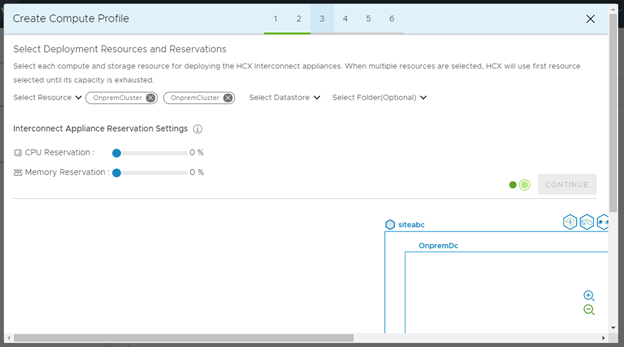
- Select the Management Network Profile:
a. Click the Select Management Network Profile dropdown menu.
b. Select an existing Network Profile. There should be a GCVE MGMT Network Profile.
c. Click Continue. - Select the Uplink Network Profile:
a. Click the Select Uplink Network Profile dropdown menu.
b. Select an existing Network Profile. There should be a GCVE Uplink Network Profile.
c. Click Continue. - Select the vMotion Network Profile:
a. Click the Select vMotion Network Profile dropdown menu.
b. Select an existing Network Profile. There should be a GCVE vMotion Network Profile.
c. Click Continue. - Select the Replication Network Profile:
a. Click the Select Replication Network Profile dropdown menu.
b. Select an existing Network Profile. Use the same network you selected for Management in step 7.
c. Click Continue. - Select the Network Containers: a. Click the Select Network Containers dropdown menu. b. Select the TZ-OVERLAY network. c. Click Continue.
- Review the connection rules and click Continue. a. Click Finish to complete the setup.
Create a Service Mesh
The next step is to create a service mesh between on-premise and GCVE. This is the effective HCX services configuration for the source and destination sites.
- Open HCX in GCVE and navigate to Infrastructure -> Interconnect -> Service Mesh.
- Click the “Create Service Mesh” button at the top right.
- Select the two sites you wish to pair from the available sites in the dropdown lists.
- Select the Compute Profiles for both the source and destination sites.
- Select the HCX services to be activated.
a. All services should be available as HCX Enterprise is deployed in GCVE.
b. If your connection to GCP is less than 1Gbps, ensure WAN Optimisation is enabled. - Configure the network extension appliances deployed per switch or Transport Zone.
a. Under Advanced Configuration, ensure you are happy with the Network Appliance Scale Out settings. - Review the topology and click Continue.
- Name the Service Mesh and click Finish to complete the process.
Extending On-Premise Networks To GCVE
Our next step is to extend networks into GCVE.
- Open HCX on-premise and then navigate to Services -> Network Extension and click the “Extend Networks” link.
- Select the service mesh you wish to use. This should be the on-premise name to your GCVE HCX name.
- Select the network or networks you want to extend into GCVE. Click Next.
- Select the Destination First Hop Router from the list of available routers.
- If you need to use Mobility Optimised Networking, enable this via the checkbox.
- Provide the Gateway IP address and prefix length for the network being extended in CIDR format.
- Select the appliance to use for the network extension.
- If you need to allow overlapping VLANs, (not required in GCVE), check the option under the Settings - optional dropdown.
- Click Submit to finalise the extension.
This can take a few minutes to complete depending on how busy your HCX appliances are.
Migrating Workloads
Here is where the fun begins.
The process to migrate a single or multiple workloads is exactly the same and is detailed in the below 10 steps.
- Navigate to the HCX Dashboard. In GCVE, this will be under the Menu at the top left of the window.
- Navigate to Services -> Migration. The migrate tracking window will display a summary of existing virtual machine migrations.
- Select Migrate. This will pop up a new modal window with the migration wizard.
- Select the Remote Site Connection if you have more than one.
a. If you require a reverse migration, select the checkbox beside Remote Site Connection named Reverse Migration. - From the list of VMs presented, select those to migrate. a. Click Add at the top right to add these VMs to the migration batch.
- Set the Transfer and Placement fields:
a. Compute Container defines the Resource Group to add the migrated VM to.
b. Destination Folder as the name suggests is the folder on the destination side.
c. Storage is the vSAN to use for the migrated VM. If you use a custom storage policy, be sure to select it from the dropdown at the top of the selection window prior to checking the vSAN.
d. Migration Profile is the type of migration to perform. Your options will be defined by the version of VM hardware level. - If you wish to schedule the cutover, add a changeover schedule under the Migration Profile options.
- Select the destination network for each VM to be migrated.
a. In most cases, the stretched network between the origin and target sites is automatically selected. Update this as required. - Click Validate and resolve any issues raised by the wizard.
- Once the wizard is happy, click Go to start the migration.
If you have selected a switchover schedule, the VM’s will sync until that time and then at the date and time you selected, all VM’s will start the changeover process. If your migration type is bulk, then the source servers will all power off at once. If you chose vMotion or RAV, the servers will changeover one at a time.
If you didn’t select a switchover schedule, the migration will change over as soon as the replication has completed.
Limitations
2Gbps per HCX-IX. Workaround is multiple IX with L2E per IX. Affinity Groups are not supported during migration. Remove them, migrate, re-apply them. Shared disks cannot be migrated. Also, disks marked as “multi-writer” need to be changed to “single-writer” before they can be migrated. VM hardware levels effect the available migration types. V9 and above can use any migration type. V7 can only use Bulk migration. Snapshots need to be deleted before migration.
Wrap Up
Hopefully this article has shown you how simple migrating a VM from a remote vSphere cluster to GCVE.
Did you know that HCX can also act as a DR solution by replicating VMs to another vCenter and perform failover testing without the need to buy a VMware SRM license? Check out the docs here: VMware HCX DR